Leaf 'n Linen Mini Basket Tutorial
At the beginning of the month, I made a little basket, and attached a fabric origami butterfly to it. (This fabric butterfly is our Across The Pond Sew Along project for September.
I didn't show you the other side of this linen basket, until now...
 |
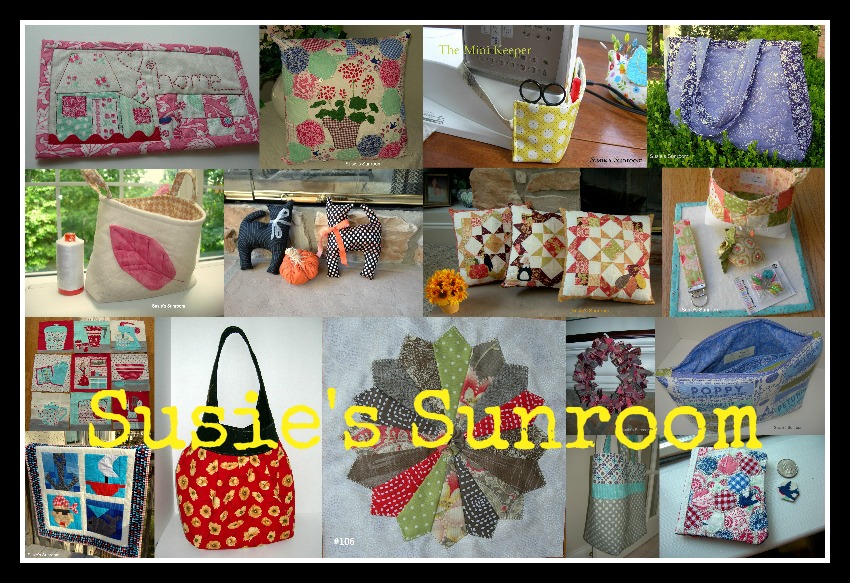
| Leaf 'n Linen Mini Basket by Susie's Sunroom |
If you would like to make this little basket, in linen or all quilting fabric, I made a tutorial to share with you. And it's free.
For easy printing, you can click HERE for a pdf file
This cute little basket can be a big helper around your sewing machine or cutting table or in other parts of your house ...
Finished dimensions - 6 " w x 4 1/2 " h x 2 1/2 " d
For easy printing, you can click HERE for a pdf file
Leaf ‘n Linen Mini Basket
Tutorial SS04
By Susie’s
Sunroom 2014
Create a
cute little basket that can be a big helper around your fabric cutting and
sewing machine areas…
Finished size: approximately 6 “ wide by 4 ½ “ high by 2 ½ “ deep
You will find this
mini basket is FQ and “scrap friendly”.
You can easily piece scraps together to make the outer and lining fabric
pieces. I used leftover linen for my
outer fabric.
Seam Allowance: ¼ “ unless otherwise stated
Materials Needed:
Main
(linen) fabric- outer: 1 Fat Quarter
linen material or
cotton or scraps (I use
Kaufman Brussels Washer Linen blend)
Lining
Fabric- inside: 1 Fat Quarter or scraps
Leaf or another embellishment: Scrap fabric
( 10 “ wide by 3 “ tall )
Fusible
Interfacings (providing stiffness to basket) –
¼ Yard Pellon Shape-Flex Woven
Fusible SF101
¼ Yard Pellon Fusible Fleece FF987
Leaf
shape pattern - a simple leaf shape, for instance ( approximately 3 ½ “
tall by 2 “ wide). A leaf template , for tracing, is on last page
of tutorial. (page 9). You could make
any kind of leaf or add a butterfly…
Denim/Jeans
needle - I use this needle on anything with several
layers and fusible fleece.
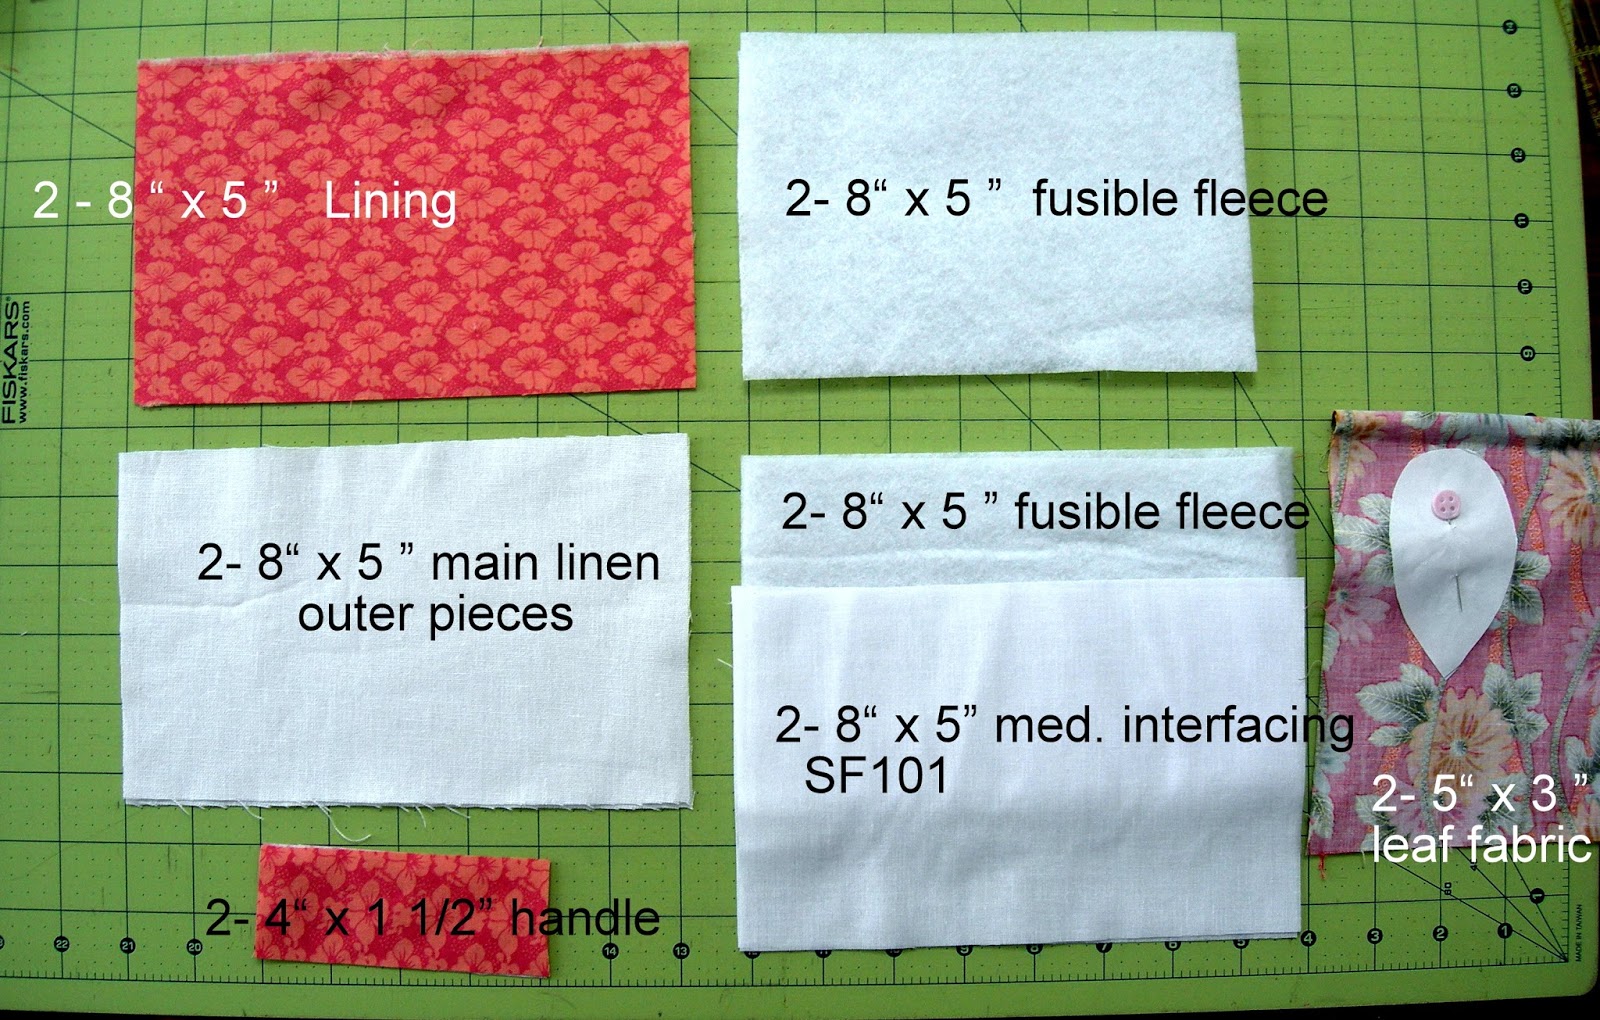
Cutting The Fabrics:
Main
fabric- outer: Cut 2 linen fabric-
8 “ wide by 5 “ tall
Lining
fabric- inner: Cut 2 lining fabric- 8 “ wide by 5 “ tall
Handles- Cut 2 lining fabric- 1 ½ “ wide by 4 “ tall
Leaf/
embellishment - Cut the leaf fabric- 2 – 5 ” wide by 3 “ tall
Interfacing- Cut 2 - ShapeFlex SF101 - 8 “ wide by 5 “ tall
Cut 4 – Fusible Fleece
FF987 - 8” by 5 “ tall
**Interfacing
note: I put Fusible Fleece FF987 on all
four pieces, to make the basket stiff for holding objects. You may choose to use less **
Leaf
template- trace the leaf shape onto freezer paper (or use the
template of your choice). Cut leaf shape
out.
Step 1: Iron the interfacings onto the fabric-
Following
the manufacturer’s instructions, ironing to the wrong side of fabric :
Main fabric- outer
piece: iron 1
- SF101 interfacing to each main linen
fabric piece wrong side. (Note: after
these pieces cool, you will be ironing the FF987 fleece on top of the SF101 interfacing.)
Then,
secondly, iron 1- FF987 fleece piece on
top of the SF101 interfacing, on the wrong side of fabric of each main fabric
piece.
Lining fabric- inner
piece: iron 1 FF987 fleece piece on the back of each
lining piece wrong side.
Step 2: Quilt the outer fabric and the lining-
Quilt
these basket pieces… a little or a lot, according to your preference. Quilting can help make the little basket a
little stiffer. My suggestion:
Quilt the outer main
linen fabric
with some simple straight lines on the diagonal. ( I use a Clover Hera Marker to crease the
lines before I sew them. These lines
show up well on the linen w/ interfaced backing.)
Mark the center line… at 4 “ . Find the 2 ½” center point on this line, and
use a ruler and Clover Hera Marker to make a crease to the top corner. Do the same on the opposite side. Quilt lines about 1 “ apart to make this “V” shape , that is, to echo a “V” shape.
Quilt down the center line first, from the top to the bottom.
Next, quilt, as desired, the outer main linen fabric pieces .
Quilt
the lining pieces - simply making one
big “X” , from corner to the opposite
corner. (You can add more quilting, as
desired.)
Step 3: Make a leaf and handles:
For my leaf :
The
leaf embellishment inspiration for my
basket : I love the look of a “Zakka Style” leaf. My very basic leaf shape and embroidery comes from the book,
” Zakka Style “ (compiled by Rashida Coleman-Hale. ) The pattern design is in the Nesting Boxes design-
by Laurraine Yuyama page 108.)
You
can use the leaf template ( at the end of the tutorial p. 16 ), change it , or make your own embellishment shape for your basket.
This leaf template will give you the approximate
size. For example, add a fabric butterfly.
To make a leaf
applique: Lay the 2 leaf fabric
pieces right sides together (RST). Pin the leaf template on top of the fabric,
on top of the fabric (wrong side up.)
Sew
all around the leaf template, using small stitches . (Sew closely to the
template’s edge without sewing on the paper.)
Cut
about ¼” away from this stitching,
creating the ¼” seam allowance.
Separate
one piece of fabric from the other, by “pinching” the fabrics apart in the
center area. Carefully, cut a little
slit, just long enough for you to pull the Right Sides of the leaf fabric out
through this slit. I like to use a chop
stick to help push the fabric out through the slit and to turn out the leaf
shape. Iron with steam to flatten out
the leaf. The slit will be the bottom,
unseen side.
Pin
leaf onto the front of one of the linen main fabric pieces. (Make sure the slit
is face down on the linen.) Place leaf
so it is near the center, and at least 1 inch down from the top edge and at
least 1 inch up from the bottom.
Now,
have some fun! Change your thread to a
color that will contrast with your
fabrics , and create veins on your leaf.
I sewed a center line first, “up and down” the leaf, and then some added
veins to the left and right sides of the leaf.
To make the handles: Iron both handle pieces- fold
lengthwise Wrong Sides Together (WST) , creating a center fold line. Open it up.
Fold
one 4 “ raw edge side to meet this
center fold line . Iron .
Fold
the other 4” raw edge side to meet the center fold line . Iron.
Now, fold
both of the 4 “raw edge sides to meet at the center fold again, and then
fold one more time to make the handle
strip. There will be no raw edges, and
it will now measure at 3/8” wide. Sew
along the 4 “ side (where the folded edges meet.)
Sew along the 4 “ side
where the folded edges meet
Step 4: Sew the outer linen pieces together, and the
lining pieces together-
Outer linen basket pieces- Place one main
linen fabric piece with the wrong side facing up. With a pencil, mark off a 1” by 1” square in the bottom left and bottom right
corners (on the wrong side. ) Cut a 1 “ by 1” square out of the left bottom corner. Cut the right bottom corner
square out ,as well. Set this piece
aside. Cut the two 1” by
1” squares from the bottom corners of
the other main linen fabric piece in the same way.
Place
one main linen fabric piece right side up.
Place the other main linen piece right side down onto this piece. (RST).
Pin together. Set aside for now.
Lining pieces- you
will be cutting out the bottom corner 1”
by 1” squares in the same way for the lining piece…
Place
one lining piece with the wrong side facing up.
With a pencil, mark off a 1” by
1” square in the bottom left and bottom right corners (on the wrong side. ) Cut a 1 “ by 1” square out of the left bottom corner. Cut the right bottom corner
square out ,as well. Set this piece
aside. Cut the two 1” by 1” squares from the bottom corners of the other lining fabric piece in the same
way.
Place
one main linen fabric piece right side up.
Place the other main linen piece right side down onto this piece. (RST).
Pin together.
Mark approximately
3- 4 “, on the bottom seam of this lining
piece. We will not be sewing stitches
here. This will be the turning out opening.
(See below photo )
Sew on machine: Outer
main linen fabric piece- Using a ¼” seam allowance, sew the left side seam , and then the right side
seam of the outer main linen fabric
pieces. (Don’t sew where the “box” used
to be, yet.) Reinforce the stitches at
all of the edges .
Next,
sew the bottom edge on the outer main
linen fabric piece . Put this piece
aside for now.
Lining piece- Sew the lining
pieces together in the same manner…. Sew
the left side seam , and then the right side seam. When sewing the bottom seam, make sure to leave the opening for turning ! (see the diagram on bottom of page 8 .)
Shaping the basket:
Now
we will be sewing the bottom open corners together, to make the bottom box-like
in shape. Separate the layers ( where
the 1 “ square was cut out from ), so
that the side seam aligns with the
bottom seam, and the corners line
up. Pin this, so that you can sew across
this opening section. This will create a seam about 2 “ long . Do the same for the other bottom lining
corner.
Take
the main linen outer piece, and sew the corners closed in the same manner, creating the box-like
shape in both bottom corners. Now your
little basket will sit flat.
Check that the lining
fits into the outer linen basket piece:
Now
is a good time insert the lining piece
inside of the outer linen piece , as a “test” to see that the top edges are the
same size. Match up the raw edges, and
pin roughly in place. (It doesn’t matter
if the pieces are right side out or not in this test step.) If the lining is too large, you can simply
make the adjustments needed so that the seams match up exactly.
(A wider seam allowance sewn at the top of the
bigger piece may be needed to even the pieces up.)
Sew the handles onto
the outer linen basket:
Turn
the outer linen piece right side
out. Pin one end of handle (RST) ½ “ to the right of one side seam.
Pin the other end of this handle (RST) ½” to the left of this side seam. (They are pinned 1 “ apart, and
will extend about ¼” over the raw edge .)
Baste in place with 1/8” seam
allowance.
Now
pin the other handle in the same manner on the other side of the basket. Baste in place with 1/8” seam allowance.
Sew the outer and
lining basket pieces together:
Turn
the outer linen basket piece wrong side out again. The handles should be now inside, laying flat against the linen. Turn the lining piece right side out
now. Place the lining piece inside
the outer linen piece, so that they are facing right sides together. The
handles will be sandwiched in between the outer and inner pieces. Align the seams and raw edges around the top
edge, and pin in place.
Sew
together the inner and outer basket
along the top edge with ¼” seam
allowance.
Turn
basket inside out, so you can see the opening in the lining
piece, and pull the bag out through this opening.
Keep
pulling until the right sides are all out.
.
Now
we need to close the opening in the bottom of the lining.
Turn under the seam allowances at the opening and pin this opening shut . I press this seams to
make it easy to sew by machine. You can sew by hand as well. Neatly sew right sides together along this
opening.
Topstitch along the
top edge of basket:
Push
the lining into the basket, so it lays flat against the bottom and all
sides. You may need to gently “coax out”
the box corners in the bottom a little.
Press along the top edge , and
pin in place, making a crisp, neat edge
for the top of the basket. Topstich all
around with 1/8” seam allowance. Start at a side seam , at the handle. Take
your time and go slowly in the thick areas, to make it neat.
Your
“Leaf ‘n Linen Mini Basket” is all ready to use!
Leaf Shape Template:
“ Leaf ‘n Linen Mini Basket Tutorial SS04 ” is
an tutorial
by Susie’s Sunrooom 2014
For easy printing, you can click HERE for a pdf file
There are many ways you can find to put a cute little basket to work for you ...
 |
| Leaf 'n Linen Mini Basket Susie's Sunroom |
 |
| Leaf 'n Linen Mini Basket by Susie's Sunroom |
 |
This mini basket can hold more than you think .... Susie's Sunroom
|
 |
| This is it's favorite job.... holding Aurifil thread spools! Susie's Sunroom |
I would love to see any Leaf 'n Linen Mini Baskets that you make with my tutorial!
You can send them to Legato1958@aol.com . Let me know if I can post your picture on my blog!
 |
| I'm off to my sewing room! |
Linking up at: Threading Your Way @ Threading My Way and
Can I Get a Whoop Whoop @ Confessions of a Fabric Addict and
Fabric Frenzy Friday @ Fort Worth Fabric Studio and
TGIFF ! @ Quokka Quilts and
Sew Cute Tuesday @Blossom Heart Quilts