Monday, October 28, 2013

Patchique Blocks 3 and 71

Patchique Quilt Project     Week 2   Blocks #3 and #71


I love sewing on a  fall day, with a blue sky, the cooler temperatures, and  the beautiful leaves turning gold, orange, and red.
And I actually  got a lot of sewing  accomplished this weekend.

Sew Along with Amanda @ The Patchsmith blog
with Japanese Taupe Quilts book by Susan Briscoe
This week's first block:    #3  Sakiori shima  (Rag -weave stripe)
Block 3    courtesy of Susan Briscoe
The directions - sew together 27 small pieces of fabric. (Yikes!  Will my block be square after all of that?) I shouldn't have worried ....  Amanda figured out a more concise way.... sew together long  strips of the two colors, and cut them into 3 segments, to then piece together.  See her blog post on how she made her block.  I love Amanda's gift of un-complicating patterns.  


My #3 block:
#3   Sakiori shima (rag-weave stripe)  Susie's Sunroom
The next:   #71  Mizuno kengata rokuyo   (Mizuno sword-shaped six leaves)

#71  courtesy of Susan Briscoe

I decided to bring in some of the  red colors now , with this block.
I love how it popped out!
Block # 71  Mizuno kengata rokuyo    by Susie's Sunroom
 Here are all 4 blocks so far.....

Patchique Quilt Project blocks so far             by Susie's Sunroom

I have had so much fun making these blocks!   I think I will make a pillow someday, using the #71 pattern.
(Don't tell anyone that I have the #3 block in sideways in this group picture....)

I'm off to my sewing room!

Friday, October 25, 2013

And Sew On Block of the Month Quilt

And Sew On Quilt


And Sew On BoM   by Kristy at Quiet Play blog

I just finished sewing my And Sew On BoM  paper pieced  blocks together!  We started the first block in January, and the year has just flown by!

As a recap,  here is a picture of my 9 blocks:


My 9 blocks    And Sew On BoM   
It took a lot of "thinking"  and "laying out fabric" time to pick the fabric and color for my sashes( the background).  

I decided on: 

  •                      601 Sewing Kit  The Henley Studio  Makower UK    for sashing
  •                      600 Scissors   The Henley Studio  Makower UK   for binding
  •                      white tonal for the backing


The Henley Studio  Makower UK  for sashes and binding
 The colors in the 9  blocks popped out using these fabrics.  When I put a "matching" pale aqua or pale yellow for the background,   everything just looked "blah" to me.   
       
And Sew On  BoM Quilt   by Susie's Sunroom  2013
                       
Details:
Final quilt size:    36 1/2 inches x 36 1/2 inches
Batting:   988 Pellon White Low Loft Sew-in Fleece

I added a few extra embroidery touches to some of the blocks before putting them together....

A tiny  "crystal" door knob

Thread coming off of the spool 
Needle   and a computer screen on my sewing machine

Steam from the coffee and an eye on the needle

I pieced a label from scraps
The back:


The back side has a label


And Sew On BoM quilt


I am going to hang my quilt on a wall in my sunroom, where I sew.   I hope to use the 3M Command hooks... I'll let you know how that turns out.


I also wanted to share another project with you, that I made featuring the Scissors Block:
a tote bag

The scissors block     becoming the front of a tote bag
A wonky star for the back side of the tote bag


The scissors block is  featured on the front of the tote bag

I want to personally thank Kristy,  who loving designed these paper pieced blocks.  Thank you for satisfying my  "paper piecing" addictions , for  inspiring me, and for gathering together sponsors with awesome prizes. 

By the way,  Kristy has just announced a new BoM for next year...with a retro kitchen theme!  What fun this will be!!    Before that begins , you can see all of Kristy's patterns in her Craftsy shop!  You will be amazed at all of the patterns she has created! 

I feel happy when I look at my quilt.... remembering many fun hours at my sewing machine , 'paper piecing' away! ... and so look forward to seeing everyone's quilts and projects!

Linking up to:   Can I Get a Whoop Whoop @ Confessions of a Fabric Addict        and
                       TGIFF  @ Quilter in the Closet   this week
I'm off to my sewing room!

Sunday, October 20, 2013

Making some Farmers Wife Sampler Blocks

 Farmer's Wife Sampler blocks with  Friday Night Block Party


Weekly Block Party  by Elaine at  Summercrater.com ...   Joining in with Elaine to make blocks and Farmer's Wife Sampler Blocks

Elaine, over at Summercrafter.com ,  has started a linky group ,  called Friday Night Block Party.  We can link up a block that we made during the week, and see what other blocks everyone is making. 

Recently, Elaine began to make some blocks from The Farmer's Wife Sampler Quilt Book, by Laurie Aaron Hird.  I looked up my book, and decided to join in with her.  I want to try to make as many of the blocks as I can, to continue to  improve my block-piecing skills. (But am not worrying about being late or missing some blocks.)  I also joined in the Yahoo Farmer's Wife Sampler group,  where I can access foundation paper pieced patterns for the same blocks and get some advice on the hard blocks. I really love to paper piece, but will challenge myself to do many of  the template pieces, too, for the experience.


The Farmer's Wife Sampler Quilt book   sold at Amazon.com
I am going to use my stash for making these blocks.  (Good girl!!)   I have a lot of Denyse Schmidt fabric , in  DS Quilts line, in turquoise, gray, blues, oranges, and teals that I love. 
It will be a scrappy look, I think.

Before I began to sew, I wanted to make sure that several 'size issues' were cleared up in my mind:
  • Use scant quarter inch seam allowance?  
 Yes.   I verified that my sewing machine and quarter inch foot worked well, when I sewed  a SCANT quarter inch. After  pressing the seams, it turns out to be a quarter inch seam allowance.   Now, this should allow my templates to be put  together with the right seam allowance size. 

  • Print options... print like usual, with "no scaling to page size" ?

Yes.  And,  I  verified that when I also checked the "borderless" print option, the pattern prints out much larger... to make a 7 1/2 inch block , rather than the 6 inch block 


Checking the "borderless" print option made the block bigger than the intended size of 6 inch

  • Is the template method or the paper pieced method more accurate (for me)?

 Paper pieced method is more accurate, for me,  for meeting points and keeping the 1/4 inch  seam allowances needed  for putting the blocks together later.


Left block was constructed with templates... I did not have a 1/4 inch seam allowance at the intersection on the right (marked as "here *" )
Right block has all of the seam allowances and the square has all of it 4 points, using the paper pieced construction

After studying all of these issues, I am ready to make the blocks finally!

Elaine started out making the block # 58   Mother's Dream  (page 185 in the book)
My block:    I chose to paper piece it this time.  


#58  Mother's Dream  FWSQ block    by Susie's Sunroom
It did turn out to be a slightly small, measuring in at just under 6 " all around.   I am not going to trim these blocks until I am ready to use them in a project.  I really liked making the one!  You might see some project using this block some time down the road....


The second week, Elaine made Block # 1  Attic Windows.    (page 128)
 #1  Attic Windows   FWSQ block  by Susie's Sunroom
I made it initially using the template method, and had to use the seam ripper a few times to keep  the square "square at the corners".  It is trickier than it looks!  I made this one by paper piecing and was happy with it.

Last week, Elaine  made the #2  Autumn Tints block.  (page 129 )


#2  Autumn Tints  FWSQ block    by Susie's Sunroom
I used the paper pieced method again, as I was under a time constraint.

Since I have 3 blocks made, I'll show you how they look together!


My blocks so far                 Susie's Sunroom
I have some bigger projects to complete soon. But it was very  enjoyable to make these blocks.  I know that I will have fun making a lot of these, and then pick out favorite block patterns to use in other projects.

I'm off to my sewing room!


Linking up to:   Friday Night Block Party @ Summercrafter
          and         Paper Piecing Party @ Quiet Play


Wednesday, October 16, 2013

Patchique Week 1

Patchique Week 1 blocks #1 and #76

Patchique Quilt Project Sew Along  with Amanda, The Patchsmith

One thing that I have learned, is that I have a lot more fun  "learning  as I sew" and trying  new techniques out, when I am  sewing along with someone else.  Or with  a whole group of quilters.   This is why I like to be in sew along groups. I love to see all of the variations and special touches .

I  also love knowing  if there were any problems along the way  ,so I can also "look out for" and hopefully avoid these problems.  (I run into enough of my own problems  mistakes , without adding on any others! lol)  I  know that the more piecing and patchworking that I do , the better I will become at making blocks of all kinds.


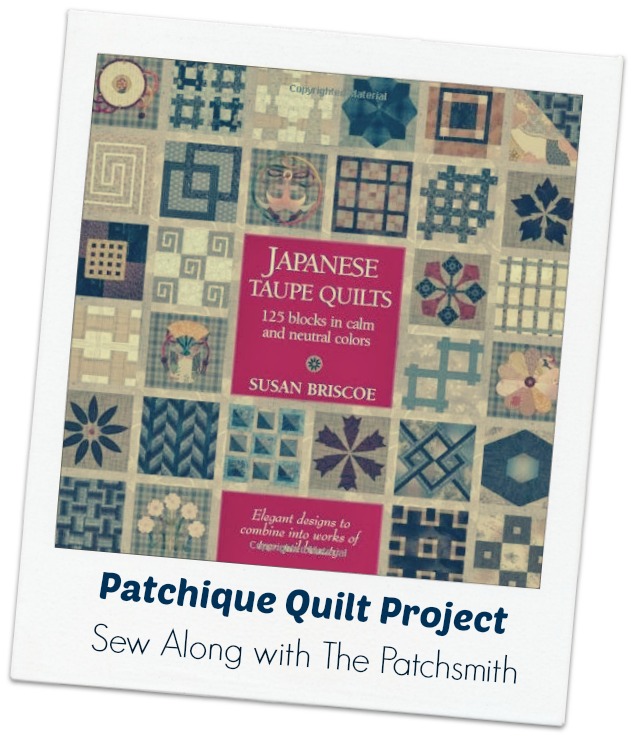
Look what Amanda, over at The Patchsmith blog has  lined up for a sew along !  This is a brilliant and beautiful  idea that I felt I would love to be part of!


Amanda is using the patterns from this book, " Japanese Taupe Quilts"  by Susan Briscoe
The book says these blocks make cool, calm quilts that are at home in both  modern country settings  and  chic urban settings.


Here are the details about Amanda's  Patchique Quilt Project Sew Along...

She will be creating a quilt based on 9” blocks from Susan Briscoe's  book.  The main section of the quilt will consist of 49 blocks (seven rows of seven blocks) and she will  be making one patchwork and one appliqué block every 2 weeks.  This is what The Patchsmith calls  Patchiqué.  We don't have to do the  taupe colour theme. Amanda is  using beige, tan, green, cream and raspberry colors. 


Every 2 weeks , The Patchsmith  will  detail two blocks that she made from the book,and she'll give us her hints and tips.  (This is my favorite part!! Help AND tips!! ) Amanda absolutely excels in these skills.      Her  pattern designs are concise and clear and easy to understand! { They will spoil you!}
Amanda will  then write about her  Patchique experience  on the second and fourth Sunday of each month.  

That's when I will read about those 2 blocks and see what I will need, to make my own version of those 2 blocks.   I may be late some weeks,  and I may pass on certain blocks, and end up not making every block in the book   (I want this to be a fun learning project, so that is ok with me.) 
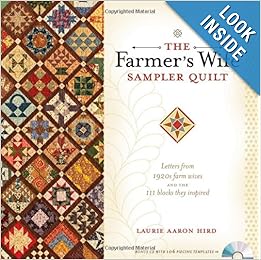
I  think that I would like to make a lap quilt.   The book has directions for other projects, too,  using the Japanese taupe blocks... like a pillow and wall hanging and a tote bag. I will be making some of these other projects with the blocks!

My fabrics:                 I decided to use fabrics mainly from my stash (Yay!):
My fabrics      They make me feel happy and calm

The foundation: 
Brown and cream toiles~  Fa La La La La Noel A'La France  by French General for Moda


What I began with        Fa La La La La    by 3 Sisters for Moda

Taupes and colors:
Light taupe floral, paisley ~  Martinique by 3 Sisters for Moda  (these have taupes, reds, light sage, light turquoise colors)


To bring in color     Martinique  by 3 Sisters for Moda

Stash ~  blending in with  reds, sage, turqouises , taupe , etc
Blenders~   cream   Essentials  by Wilmington Prints,  and
                cream   Grunge  Essence Cream  by Moda


Various colors and blenders to go with Martinique and with brown


Geometrics- for color , interest and some directional~  Painter's Canvas  Magnolia Lane Collection by Laura Gunn for Michael Miller


I love brown and turquoise and aqua  
Just in case... if all of the blocks don't look good together, then I will make other projects that  use the blocks that "work" together!  
My Patchique fabrics


So, here begins my journey on The Patchique Quilt Project!

Week 1:          First, I read  The Patchsmith's blog post for her comments and help:
                                                      click here


Patch Block  ~  #1:   Kasuri square check  (Kasuri koshi kaku)


Block 1 - Kasuri koshi kaku from the book

Susie's Sunroom block:
#1  Kasuri sqaure check    Susie's Sunroom
It turned out well,  using scant quarter inch seams.  9 1/2 inches unfinished


Applique Block  ~  #76:   Nine bamboo leaves wheel (Kumai sasa kuruma)


Block 76 - Kumai sasa kuruma from the book

Susie's Sunroom block:
Amanda offers this good advice -to use a protractor to place the petals 40 degrees apart , around  the circle.   (She said you can google ' printable free protractor'  (look for full circle and print it out.)
I used Heat n Bond lite fusible and  ironed the bamboo leaves onto the block. Then all pieces were outline stitched using the blanket stitch (by machine.)
Nine bamboo leaves wheel           Susie's Sunroom
I am happy with my first two blocks in the Patchique Quilt Project.  (They are prettier in real life with some warm tones.)


What's next?  Amanda is working on blocks # 3  and #71 .  That's what I'll be doing!

If you 'd like to learn to  make some beautiful blocks, and try something different, won't you join in with us?  The more making these, the merrier!


I'm off to my sewing room!

Sunday, October 13, 2013

Pretty Pincushion

The Prettified Pincushion

I just couldn't resist making the last project in the book,  Patchwork, Please!  by Ayumi Takahashi, in the Zakka 2.0 Sew Along.


Many folks have made every project in the book, and showcased their gorgeous 'patchworky projects' in the Flickr Group.    Debbie, from A Quilter's Table , has been the hostess for the 2nd half of the sew along.

Maybe the reason I couldn't resist making it had a little  to do with my sister's  down-right irresistible project...


Amy  of  Amy Made That!  's  Prettified Pincushion  photo courtesy of Amy
I rounded up some DS Quilts fabric , in several shades of blue, grays and orange, and my Brussels Washer Linen.    I wanted to make sure that I had enough seam allowance around  the paper pieced pattern, so I added 1/2 inch to every side.  This resulted in a slightly larger pincushion,  with the top and base measuring in  at 5 1/2 inches square, and the sides at 1 1/2 inches by 5 1/2 inches.  I love this size.  I filled it with my "usual" crushed walnut shell kitty litter, and it has a nice heavy feel to it.


 Prettified Pincushion     by Susie @ Susie's Sunroom

a turquoise button
I found a button with turquoise in the middle, and decided to use it instead of the fabric covered button this time.   


Prettified Pincushion    by Susie @ Susie's Sunroom


I will be making this cute pincushion again, and will  make other projects from the book. 


Linking up at :   Paper Piecing Party @ Quiet Play
I'm off to my sewing room!