Wednesday, August 28, 2013

The Bookbag Backpack and a Giveaway!

It's a cute Bookbag and a Backpack... in one

I am as happy " as a clam" when I am testing out a new pattern.  
Sew couldn't be happier right now, because I just got to try out a new backpack pattern designed  by Samantha at At Home with Mrs H !  


Samantha's new pattern.... The Bookbag Backpack
For the first time , when I was picking out what fabric to make the backpack ,I decided to use a home decorator weight fabric. I wanted a fabric with extra durability.   I chose all of my fabrics from Terry's Fabrics .  Terry's Fabrics carries gorgeous  curtain fabrics.  ( I think this is what we call home decor weight, here in the US.  ) The prints are big and so pretty.

Fabrics:  I chose Sayuri , in moleskin color , for my main fabric.  
Sayuri   in moleskin color
Then I picked this brown poly/cotton blend fabric for the handles and straps.
Kensington  fabric    in mushroom color 

I wanted the lining to pop out with color, and luckily, they had just right color of yellow... lemon!


Panama cotton  Lemon
Zipper:  Coats Sport zipper  30 in   (I got mine at JoAnn Fabrics)
            2-  10 inch nylon zippers (from Zip It )
2 Tri-glide buckle ,4  square rings, 2 swivel hooks from JoAnn Fabrics

Intefacing:  Pellon SF 101   and Pellon FF987

I decided to split my tasks into several days, since this is a bag with many pieces to cut out and sew. 

  • Day One, I read through the whole pattern and was so thankful that  Samantha's  pattern has excellent directions and pictures to show all of the steps in making this backpack.  I then cut my pieces from the fabrics, and labeled them.
  • Day Two, I cut all of the interfacings out.  Since the outer fabric was home decorator weight, I used the SF 101 interfacing on the backs of those pieces.   I used the FF987 fleece for the lining.  And the straps were made from a poly/cotton blend, and after making a small test strap, I decided it did not need interfacing. Then, I sewed all of my straps and handles and hooked up the hardware to them.  I used a brown thread that blended with my brown fabric.
  • Day Three, I sewed my bag together.  
( I left out , Day Two Evening.... I carried  my finished  straps ,with the cute  hardware attached, around all evening and then  to bed , to admire )

The backpack finished size is :  12 inches wide x 14 inches high x 3 inches deep
This bag can hold a lot!
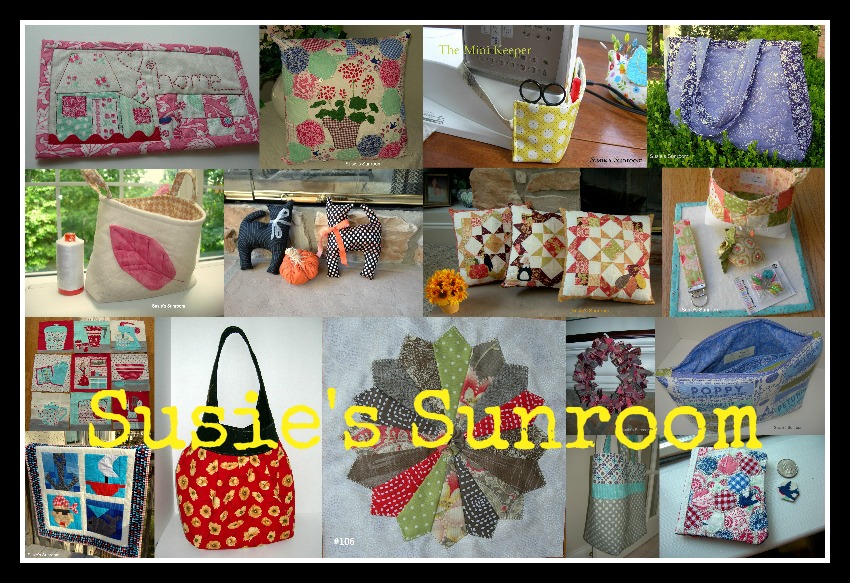
The Bookbag Backpack     by Susie's Sunroom

I love the yellow pop, from the lining of the outer pocket.
It has strap for over the shoulder, too!


The back side  , with the backpack straps
Inside, it has a zippered pocket in the lining.   I added a slip pocket on the other side.
I smile when I look inside my bag, seeing this beautiful, lemony fabric!


Handles on the top of the bag.  I love these details.
Surprise.... there's another zippered pocket in the front pocket!!


What do I think about this bookbag backpack , after making it?
I  L.O.V.E. it!!

It's sturdy in it's design... yet so stylish.
It will hold a lot of fabric books and things!  It will really 'work' for you.
You have the options of using it as a backpack , or a bookbag .... using the  handles on top  or the shoulder strap.
It has lots of pockets!!!  I adore that front zippered pocket hidden  inside the front slip pocket!!

This was a project where I did have to stop to  rip out some stitching.... but it was a careless mistake that I made.   
I put one of the backpack straps on upside down.   (I  now have marked my directions with a red marker at that section!!)  But this is an error caused by my rushing around and not "checking it twice".

Will I make it again?  I most certainly know that I will. I think I might  make one , leaving the backpack straps off.  I love the handles at the top of the bag, and the shoulder strap.
I can see it carrying my laptop around when I travel.


Where can you get this fabulous pattern?   Click here:   At Home with Mrs H 
It is available on instant download!!  

Not only is Samantha an awesome designer, but she is also a sweetheart who is donating a free pattern for a giveaway on my blog!!  That means that you have a great chance of winning this beautiful and functional bookbag backpack pattern!!

This giveaway is now closed.  Thank you for your comments!
When?            August 28, 2013  12:01 am EST  -  September 4, 2013 10:00 pm EST
How to enter:    leave a comment on this blog post....  anything will do.
 Need an idea?  You can tell me what you would carry in your bookbag if you made one !
Leave me your email address in the comment....     then I will email you directly if you are the winner.  (If I can't find an address for you, I will have to have Mr Random Number Generator pick a new winner.)


Good luck!  
I'm off to my sewing room!

I am linked to :  And Sew We Craft Together Linky Party @ And Sew We Craft

                              Sew  Darn Crafty @ Sew Many Ways


Thursday, August 22, 2013

Sew Much Fun With Blocks

August Blocks

August is flying by so quickly, isn't it?!  
Even though it has been very busy, I have been able to fit some fun blocks in this month.

First block:  the  August " And Sew On BoM"  
                            
Quiet Play's block of the month
This month's block is very detailed, and took quite a while for me to pick out my fabrics.  I wanted to use fabrics that I have used through  the other blocks, and also use some from scraps from my real stash piles.


And Sew On BoM  August block   Stash Cupboard    by Susie's Sunroom
I would love to have yellow gingham wallpaper in my sewing room!  (I would also love to have nice neat piles of fabric, too!!)


And Sew On BoM  August block   Stash Cupboard    by Susie's Sunroom


Isn't the pile of fabrics cute, on the floor?  That REALLY IS LIKE MY SEWING ROOM!!
My eight blocks so far in And Sew On BoM   
Wow, I think September will be the last block. Time is flying by...

Kristy, of Quiet Play,   is a busy lady  designing new blocks all the time.  Her patterns for paper piecing are available at Craftsy . She has 105 patterns in Craftsy so far!   

Check out her totally cute and fun knitting block. I was lucky to be a pattern tester for her. It will be in Craftsy soon....


Kristy's  Knitting Needles pattern
I decided to use some fabric that my daughter liked when she visited recently.  And when she knits, she uses a lot of brown yarns.  So my block is tailored to her color tastes....


Knitting Needles pattern by  Kristy of Quiet Play       by Susie's Sunroom

Love how the yarn ball is designed with the piecing... it looks wound


I added a sash for a border, and machine stitched some binding on to this cute block to finish it up
Shhh, don't tell my daughter I made this for her!  ;)

And, the third block I worked on is a Pinwheel Star Block that I saw at The Crafty Quilter.Julie has an excellent tutorial on how to construct this block.  I wanted to make it, because our August theme for Across The Pond Sew Along is pinwheels.  

Pinwheel Star Block      tutorial by Julie at The Crafty Quilter
I had so much fun making this block.  And I learned some great tips from Julie,  such as how  to keep the seams lined up .  I added a sash and just need to do some quilting on it now.  I want to make it into a table topper.

Pinwheel Star Block         Ready to quilt     by Susie's Sunroom
If you made any pinwheels, we'd love you to share them with us.  Put it into our Across The Pond Sew Along Flickr group.
Keep looking for details about two Blog Hops I am participating in during Sept!

(I will be having giveaways !!)

I'm off to my sewing room!


Linking up at : Across The Pond Sew Along Flicker Group
                         Paper Piecing Party @ Quiet Play
                         And Sew On BoM @ Quiet Play
             Can I Get a Whoop Whoop @ Confessions of a Fabric Addict

Friday, August 16, 2013

Pillows from the past


Making pillows... new and old

I recently had a project to do for a dear friend.  She had a curtain panel, and asked me if I could make some pillows for her couch, using this piece of fabric.
It was a piece, about 72 inches by 80 inches, in a taupe (leaning toward gray) velveteen fabric, with a  40% cotton/ 60% polyester blend.

I went to my local JoAnn Fabric shop to get some pillowforms, in various sizes.  (I used my 40% off coupons, of course!)


24 inch, 20 inch and 14 inch pillow forms

I laid the panel out on my hardwood floor, to figure out what size to cut the pieces. I decided to make the basic envelope back pillow case.  There is a good tutorial by Susan,  from Freshly Picked blog , explaining the basics of this envelope back  pillow cover.

I wrote out the size of pieces I would need to make a 24 inch square,  a 20 inch square, and a 14 inch square pillow.
I took the time to measure out the areas I would cut, to make sure that I had enough fabric for these 3 sizes.  Tailor's chalk marked easily on the velveteen-like fabric, to show me where to cut.  I wanted the hems in the curtain to be the overlap/hemmed piece on the top of the back of each pillow.

It became a little thick at points where all 3 pieces joined, but I sewed  through slowly  at those spots. ( I helped pull it along a little, too.)

The back of each pillow....  using the hemmed edge of the curtain panel
All three pillows covered and comfy for all


Scraps left after I made the 3 pillows
I used up most of the curtain :)

While I was making these pillows,  it reminded me that I recently saw some gingham pillows in my closet, that my sister, Amy, (of Amy Made That!) and I made when we were younger.
I got them out of my closet, and called my mother to ask her what she remembered about them.  We couldn't remember much!  My mom even found the third pillow , that she has kept at her house. Amy and I used to do embroidery projects and cross stitching when we lived at home.
                                                   
The third pillow at my Mom's house        photo courtesy of Amy Made That!

Our cross stitching on gingham pillows

After I asked Amy about the pillows, she did some research and  looked around on the internet, and found this blog that featured  ' cross stitches on gingham.'
The blog was called, "Susie Can Stitch."   Sept, 23, 2008, and  Susie showed these pictures from the  actual magazine we got the pattern from.   June, 1979 issue of Better Homes and Gardens. (per Susie Can Stitch)


Our pillow is like the  on the rocking chair on the right!June, 1979 issue of Better Homes and Gardens(Photo courtesy of Susie Can Stitch)
I wonder if  The Patchsmith  has  afternoon tea on a table cloth  like  this in her Palace...... hmmm

Susie Can Stitch even took a picture of the actual pattern from the magazine!  

The pattern we used  from  Better Homes and Gardens   ( June 1979)
(photo courtesy of Susie Can Stitch)
I think I made the green gingham
I think  Amy made the purple one.  It was stuffed plumper than mine!
                                       
Amy made the blue pillow      photo courtesy of Amy at  Amy Made That!


Amy sewed our pillows together, putting lace around as a border.  (I didn't ' like' to sew on a sewing machine back then....)(boy, did I miss out on a lot of fun!)
                                                   
Our three gingham cross stitched pillows


I have to admit it was fun looking back and seeing something we made in a summer of the late '70s.  
Does anyone else have mothers that keep nearly everything?  What have you re-discovered from  your early sewing and stitching  past?  

By the way, Amy also has a post about  our gingham cross stitch pillows  on her latest blog.  I am hopping over to see what she has written about them.  
I'm off to my sewing room!

Sunday, August 11, 2013

My Lucky Star


My lucky star....

August is still a busy month for many of us.  Everyone that I know who loves to sew, is busy trying to fit  projects and blocks in  between visits and vacations and activities during our  warm weather.   I was lucky to be able to sew a  purse this week, and win in a giveaway!!

I already considered myself lucky to have found a delightful blog to follow , called Cat Patches
Cat Patches  by Barbara

 I just  love to see what Barbara is up to with every new post.... is it about her adorable cats, her embroidery, her quilt making, her gardening , her delicious  food, her trips in the RV with her cats, or her photography today?....    I am amazed at all that she creates!  
Barbara posted about a piece of art she got for hanging on her garage. It is called a barn quilt block ,  from Classic Metal Company.  They have lots of different styles of quilt blocks to choose from.  So cute!

Barbara's barn quilt
photo by Cat Patches blog
At the beginning of August, Barbara  had a giveway , with the prize being a 12" by 12"  barn quilt block from  the Classic Metal Company.  And I was lucky enough to win it!  Yay!

Here is the block that I chose~
The Lemoyne Star
The Classic Metal Company sent it out to me immediately, and I opened it up, to love it even more in person!!

I decided to put it on top of my window frame, in my sewing room, so I can see it all of the time!


My Lemoyne Star     
The Lemoyne Star   in Susie's Sunroom
I just love walking into my sewing room and seeing it up there !  

Want to see the purse that I made this week?   It is one of my favorite styles.


Vicki's Bag   by Penny Sturges
{I got it at QuiltsIllustrated.com}
I love this bag's  cute pleats , the rounded shaping,its size,  and its contrasting band at the top.

Fabrics:    Mystique  by Riley Blake
                Mystique Stripe Grey  by Riley Blake
                 Eclipse Geo Dash yellow by Timeless Treasures


My fabrics... I loved this gray Mystique instantly


Vicki's Bag        by Susie's Sunroom

Lining and pockets ... maybe you need sunglasses to look inside here

I added the inside zippered pocket
     
Flap.... with a magnet snap


Vicki's bag.... functional AND cute !

Hope you are having a great summer, and can fit in sewing time when you want to!
I want to make some quilt blocks next....
Thank you so much, Barbara and the Classic Metal Company, for making my week!


I'm off to my sewing room!

Linking up at:   Can I Get a Whoop Whoop?  @  Confessions of a Fabric Addict
                             Sew Cute Tuesday @ Better Off Thread