Tuesday, February 26, 2013

Sewing Machine Cover


Making a sewing machine cover

A few months ago, I joined in with a charm swap group, that was called Shades of Grey.  (No, it wasn't a book club!!)

I  sent in a yard of gray fabric, cut up into 56 charms ( 5" x 5" squares.) You can see some photos of many of the different fabrics that were sent in, at this Shades of Grey Flickr group.

 Ellie Q, the group moderator,  got all of our charms,  sorted them all out, and mailed back the assortment of 56 different charms squares , all  in Shades of Grey !

I had been waiting to make something with these pretty charms, but didn't find the right fabrics to use with them... until last week.   I found some ultra -cute DS Quilts  Collections  Farm Stand Dots Yellow.  It has the bigger cream dots, and all of those little polka dots in gray. 
DS Quilts Collections Farm Stand Dots Yellow
A yellow square is paired with  a gray square

I decided to make a block of HST (half square triangles).  I diagonally cut the 5" squares through the center, stacked a yellow triangle on top of a gray triangle (right sides together), and sewed them together with a scant 1/4 " seam on the long side.  They trimmed up to be 4 1/2" squares.


Next, I played around with the arrangement of the squares, and liked it this way.  I sewed 8 squares together, and added a  2 " sash on the top and bottom, and 2 1/2 "  sash on the left and the right sides.

This block is now 21 1/2 " wide by  11 1/2 " tall.

 I realized that it would make a pretty and graphic  front side of a sewing machine cover.  So I sewed up 8 more squares the same way, to be used for  the back main panel.
I ironed on  Pellon Fusible Fleece FF 987 to each section on the back , and quilted  some diagonal lines by machine.
 My Topaz  sewing machine is 21" wide x 11" high x 9" deep.

I decided to make a gusset, in order to connect the front piece to the back piece, that would cover the whole top of the machine.
I took my tape measure and found that it was 41 " from end to end from the table.  This is the gusset length.
Measuring the length needed for the gusset.  41 "
I made it 9
1/2 "  wide.
  The gusset width is the depth of the sewing machine plus 1/2 ".  That becomes  9 1/2 " for my machine.
  I ironed FF to the back of the gusset piece,and  quilted  it with some diagonal stitches.

I made a  simple fabric handle, from a charm HST block (Didn't want to waste any!)

 I ironed 1/4" raw edges folded over on left and right sides WS to WS , made an ironed center crease , folded  top raw edge  in toward the  center crease and ironed it ,  folded the other raw edge up to the center crease and ironed it, and  then folded the top onto the bottom sections, and topstitched  on all 4 sides.
After I fold the lower edge up to the center crease, I fold down the top half onto the bottom half.  Then topstitched on all 4 sides.
The handle is  now 1 " wide x 5 " long.  I just sewed it onto the center, middle of the gusset, with an X in a box, on each end. 
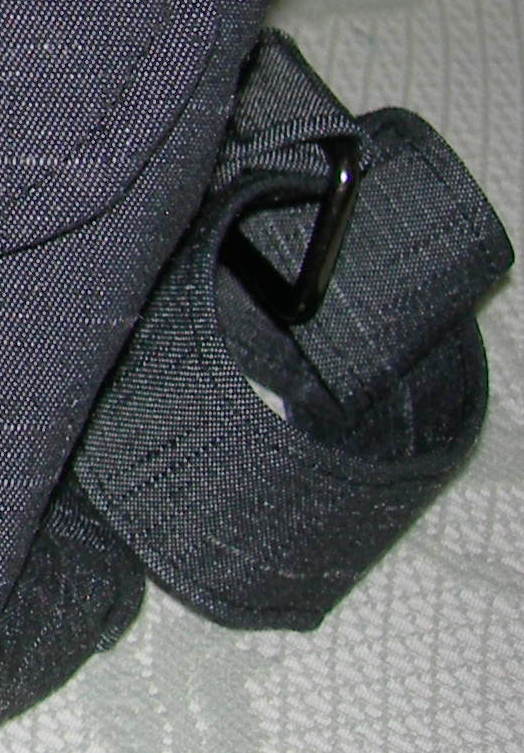
The handle is attached to the gusset center


The gusset piece (attached to the front panel here )  is 9 1/2 " tall  x  42 " long
I made sure that the gusset edges were all caught
in  the seams.
 Next,  I attached the back main  piece to the other raw edge of the gusset.
The gusset is attached to the front and the back sections now
I decided to make my lining  simple.... 2 pieces (front and back)  and a gusset.  I made the lining piece    a bit longer than the outer fabric.  This extra fabric will then become the 'binding' edge  that will show on the front, after pulling out  the bag through a gap in the lining.

Lining:   Gusset piece-  1 -  42 " wide x 9 1/2 "  tall
             front and back  2-  20 1/2 "  wide x  11 3/4 " tall
I sewed the gusset to the front side piece, and then the back side.  (No Fusible Fleece)
I left a 5 inch  gap for turning in one of the side seams.

After measuring the outer cover and my lining, I decided to trim off 1 inch all the way around the bottom edge of the cover.  
I then turned the outer cover WRONG SIDE OUT,  and put the lining inside the cover, with RIGHT SIDES  and raw edges TOGETHER.  I pinned the  raw edges together and sewed with 1/4" seam allowance.
I pressed all along the bottom edge,  so that the front now had a "binding" showing, of about 3/4 ".   

The light gray is my  "simple" binding, without the bulk.  Press this and stitch in the ditch


I stitched in the ditch , where the top sashing met the gusset, on each side,  just to anchor the lining to the cover.  You can do as little or as much as you like.  You could also quilt some areas  on the gusset, by hand, to keep the lining from drooping.

Stitching in the ditch all the way around the bottom edge


Last thing to do now!  I  closed up my turning gap , in the side of the lining,  pressed and pinned it, and sewed it by machine.


My Snuggly Sewing Machine Cover

The side view of the gusset

Everything is snuggy and warm inside!


My Gray  Butterfly Fabric,   with butterflies in yellow  fabric
I used yellow thread for quilting accents!

Somebody else sent gray butterfly fabric, too!


My Viking is ready to go... no dust getting inside to her, and she's stylin' !

                  Click on the Printer Friendly  PDF  file link below: 


                  Snuggly Sewing Machine Cover Tutorial


I provided these details in a tutorial style.... in case you would want to try to make your own Snuggly Sewing Machine Cover!      
Feel free to contact me if you have any questions. ( Be gentle and patient  ....I am new at creating tutorials.)
           Send me your  pictures if you make one.


I'm off to my sewing room!

Update:    Check out Craft Gossip....   they are talking about this sewing machine cover on March 4 !


Coming in March.....

  •          a new Blog Hop Party  hosted by Michelle at Quilting Gallery  , starting March 8, with a giveaway from me!
                                           Beat the Winter Blues

  •      another sewing machine cover style designed by me
  •       a new (adorable) bag pattern tested, for Samantha of At Home With Mrs H


Thursday, February 21, 2013

Pink and Black


Pink, Black and Buttons

Can something be pretty and elegant, even though it has a "funky" shape?
I say, "Yep!"   Read on, and tell me if you agree....

One of the projects that I worked on this week was making a zippered pouch for Rosa. She wanted something  very specific in size....  about 12 inches high, 9 inches wide, and 6 inches deep. (For traveling to Italy.)

I used the  pattern  Open Wide Zippered Pouch   by Anna of Noodlehead.  These pouches are so fun and functional!  And her tutorial is excellent,  with step by step instructions and pictures , and is free  of charge!
This is the pouch, made to Rosa's measurements.  (Don't  laugh at her funny shape!)

You  might stop laughing when you see how functional this little pouch is, and how much it can hold! And see how pretty she is,  all dressed up in pink and black!!  
The fabrics---  Michael Miller   It's A Girl Thing   Eiffel  Tower Blossom Pink  and  Ta Dot.


                          She can hold a lot , being 12 inches tall and 6 inches deep.  


Rosa also needed a jewelry pouch for traveling.  I found a really cute pattern,  called 8 Pocket Jewelry Pouch on Sew 4 Home .

The original size was a little too small, so I increased the diameter to 21 inches. ( It actually looked like it was going to be TOO big after cutting it.)

The inside layers  .... with pins at the 8 spokes that I stitched outward from the center. This forms the inner  pockets.
I used a lid to sew the bottom circle shape. 

I had to laugh at these two circle pieces. They reminded me of pizza dough, when I was topstitching them, going around the outer edge!

The finished pouch

There is a lot of room inside, and 8 side pockets


The original size is the little cutie on the left.  The big momma size is on the right.  See the beads on the end of the cord?


It was a good thing that I had to make 2 buttonholes for the big travel pouch.  This was good practice for the next project I worked on. 
I had to make 4 buttonholes, and make them function for real buttons to fit inside of them  shiver  in a new project.  (I had to read directions from my machine manual.)


My Test button hole .... Worked Perfectly!!  (The real purse... not so perfectly, but did a re-do.)
Yay!!!  I did it!!!

I can only show you a peek of what I was working on ...  a super cute new bag pattern  made by  Samantha,   of  At Home With Mrs H  !     She is still refining and tweaking the pattern, but after she has released the bag for sale in her etsy shop,  I will be able to show you what I made from her pattern.  


Two little peeks......
I can't wait to show you the finished bag!


Linking up with:  Can I Get A Whoop Whoop!  @ Confessions of a Fabric Addict
                          Thank Goodness Its Finished Friday   

I'm off to my sewing room!


Thursday, February 14, 2013

Small projects... big satisfaction

Working on some smaller projects


The last few days I have been working on  some smaller projects... and enjoying every minute of it.

First Project:    February's block for the And Sew On BoM

This is a paper pieced Block of the Month group, by Kristy at  Quiet Play.  She designed the blocks, and  offers the pattern for free during  the month it is the featured pattern. (After that, it is available in her Craftsy shop. ) I love her designs and style .. and  everything she sews!  For more details, hop on over to her blog and her  Flickr group to see other beautiful blocks and projects. 


 Kristy's February block... a Seam Ripper. She  called it, "You Little Ripper." 

This is my "You Little Ripper" block for February:
February's And Sew On  block  -  'You Little Ripper'

Do you want to see my January and February blocks together?


My January and February blocks... And Sew On BoM
(I made my own ruler)
I can't wait to see the block for March!

Second project: ' Test sew' some patterns for Kristy,  Quiet Play , from  her  new Just My Type collection.   Her numbers and punctuation  pattern set will be in her Craftsy store soon!  The alphabet is available now.

The @ sign


Number 8
Third project:  Gather all the fabrics and hardware together,  to test out a new bag pattern by Samantha, of At Home With Mrs H !  I love the bags that she designs!  I hope to start sewing on it tomorrow...  After she has it available in her Etsy Shop, I can tell you about it in a blog.   

Oh, and I guess I should do a little lots of  cleaning and cooking for the weekend, too!


I'm off to my sewing room!


I am linked up at  Can I  Get a Whoop Whoop @ Confessions of a Fabric Addict


Tuesday, February 12, 2013

I *heart* paper piecing!


Paper Piecing Projects... I adore them!

Valentine's Day is nearly upon us, but I think that we can celebrate love and PINK and red and hearts during all of February, don't you?

Before Valentine's Day is here, I wanted to share a really quick, but cute, mug rug that features a heart. I think I have been seeing hearts everywhere, since this month we have been encouraging ANYTHING  Hearts for our  February project in the  Across The Pond Sew Along!

My Simple Heart Mug Rug starts with a simple paper pieced heart pattern.
I found this Simple Heart pattern   , 4 in x 4 in ,    at 
Block of the Day  by Quilt -Pro  Systems.   
Link here:  Block of the Day   Simple Heart
(It is FREE     ,  and you can sign up to get emails of a new pattern every day.)


Simple Heart Mug Rug    

  • I  wanted  to make the mug rug a little bigger, so I pieced 3 strips ( 2 in tall by 4 in wide) together , and sewed this patchwork to the heart block.   This makes a block of approximately  4 in tall by 7 1/2 in wide.
  •  I added  Pellon FF 987 to the back of my heart block 
  •  I cut the backing to be 1 inch bigger than my block, on all 4 sides. ( I really like to  make the binding come around from the back, in my little mug rugs.  It lays nice and flat.)    
  • I layered my quilt sandwich 
  • I machine quilted a few lines to echo the heart shape around the heart , and then vertically on the patchwork side, at 1/4 in apart 
  • I ironed my binding to the front side and machine stitched it, using my walking foot

Simple Heart is paper pieced , with a touch of machine quilting
Ready to enjoy a cup of latte or hot chocolate in no time !

If you get time to make  anything  with a heart theme,   upload your picture to our
 Across The Pond Sew Along   Flickr  Group, with the other beautiful and fun projects already there!
I am so inspired by your talents and creativity!
This group is supportive and relaxed... even if you can only make something every once in a while, join us!

I'm off to my sewing room!


Linking up to:

  •   Sew Cute Tuesday  @ Better Off Thread
  •  Across The Pond Sew Along @                                                    http://www.flickr.com/groups/2154636@N22/

Tuesday, February 5, 2013

I *heart* Hearts

More Hearts for Across The Pond Sew Along

I just love  pulling  out all the pink and red fabrics and having some fun with them in Februrary!

I am loving the Heart theme for our Across The Pond Sew Along this month.
Amy,  of  eamylove@  Amy Made That! launched February's theme:  hearts.


Amy made this Cupid's Arrow table runner , a modified herringbone pattern
There are a lot of ways to include "hearts" into a project... Check out a a few more ideas with me.....

Amanda,  The Patchsmith, has designed a Valentine Coaster, and offers it  to everyone as a free pattern!  Isn't she a love!!
The Valentine Coaster    by Amanda,  The Patchsmith  
I saw how cute these were, and whipped up a coaster with my fabrics. This is a fast and easy pattern, and it showed me exactly how to sew up this smaller patchwork for my background.


The Valentine Coaster  by Susie of Susie's Sunroom

I ran across another free pattern for making a Fabric Heart Bookmark  at Sew Many Ways.

Fabric Heart Bookmark 

I found this delightful  tutorial pattern for a Fabric Heart Bookmark at Sew Many Ways.  

I have been adding fabric with hearts to a regular pattern, so it can be featured in February , and still used year- long. 
I  made the Triple Zip Pouch in the Triple Zip-Along, and added the applique heart on the front.  
And recently, I  made a Cathedral Window Pincushion, and used a pink fabric, with hearts , and a black fabric with red and pink "love" words.
The Triple Zip Pouch  and  Cathedral Window pincushion
Wait a minute.... what is that up there on the far right???


Meet Valentine!!
It was easy to make a bird pincushion fit the theme by using  some heart  fabrics!   
See the machine-sewn heart stitches around the wings....

So grab something that you like to make,   and put in some hearts fabrics, and send your picture to me or our Across The Pond Sew Along group to share with everyone!!


Oh yeah,  she's going to fit right in with  the rest of the girls!!


I'm off to my sewing room!


Linking up to:        Sew Darn Crafty @ Sew Many Ways
                             Sew Cute Tuesday @ Better Off Thread