Thursday, September 27, 2012

Li'l Punkin

A mini pumpkin mug rug for my mother

I made a cute little mug rug this week.  (No surprise here!)
My mother is here for a visit this week. I always like to show her what I have been working on, and explain who people are that I have been telling her about on the phone.  We were looking  at patterns made by Amanda,  of  The Patchsmith . (use link to go to her Craftsy site for her patterns! ) My mother  saw the mug rug pattern   with two little pumpkins on it  and loved it for the fall .   She asked me to make her a smaller size mug rug with just one pumpkin on it.
Original Mug Rug by Amanda,  The Patchsmith

I had a lot of fall fabrics in my stash and pulled them out to figure out the ones I wanted to use for Mom.  I decided to use the left (bigger ) pumpkin, and add a row of 1 1/2 inch squares (before sewing), to the right of the pumpkin.

 I guess I got distracted a bit LOT,  and I  actually thought I was finished at this stage, after finishing the binding.
My pumpkin before quilting and embroidery


I soon  realized that it needed some embellishment to turn it into a cute li'l old punkin!
After  machine quilting the grooves in the pumpkin body and some vines off of the stem , and hand stitching  some veins onto the leaf, it was done.
Quilted and stitched small mug rug
Small mug rug

Mom's mug rug is ready to go home with her!  She is happy and ready to enjoy Halloween and Thanksgiving with her daily mug of tea!

Before I close, I wanted to shout out to one of my special  blog readers... my Uncle Monty!  He builds beautiful model railroad towns, creating his own landscapes and scenery! And now,  he is one of my enablers!
Susie and Uncle Monty     love you xo


I'm off to my sewing room!


Tuesday, September 18, 2012

Halloween Mug Rugs

Halloween Mug Rugs

I decided to make some Halloween themed mug rugs this week.  
I think that I have an bad case of "Mug Rug Fever" ...
Some mild symptoms first appeared  after I made my   Scottie Dog Mug Rug . I got  cranky mildly irritated when I didn't have time to immediately make a second one upon completion.  
Then,  my fever started climbing higher and higher as I read the recent posts  from Amanda,  The Patchsmith.

Spoiler alert:    Skip over  this next  area in red  if you don't want to know what Amanda's latest mug rug pattern is before you see her blog post! (or  if your immune system can't handle being exposed to the Mug Rug Bug  right now!)
*********************************************************************************************************                                  It is so darn cute and irresistible... 
                                                Elephants!!  
She has this new pattern and lots of other cute patterns available on Craftsy.              And, you won't want to  miss seeing  her blog post on Thursday, Oct. 4, as she will have an original design featured that day in  the Glorious Autumn Block Party by Quilting Gallery.com.   You will be seeing more of her patterns on Susie's Sunroom in the future.   She is so darling and talented, and makes me laugh. ;)


Spoiler End ****************************************************************************
Whiskers is pointing to her favorite one.... but she prefers bigger rugs to lay on!
 OK,  you can read now.  
I made myself finish the piles of clothes that needed to be ironed.  Then I treated myself to  some fun- by making  some mug rugs out of Halloween colors.  (Does anyone else make herself do the "chores" first ,  and then reward herself  with "sewing time" ?!)  (uh-oh...)

Here are my two new mug rugs:

Ghost  and Candy Corn Mug Rugs
 The ghost was fun to make, because I used scraps . I decided to make it scrappy for the background and the back side.
I sewed 1 1/2 inch strips together.  Then I cut the rectangle out  on on angle.
The Back:  even patchier and scrappier,  by sewing pieces together to form a larger rectangle.  

 I applied the ghost-shaped applique to the front, using Heat-n-Bond lite, iron-on adhesive.Then I  used embroidery thread to create  his eyes and mouth. (by hand).  Machine quilting was next-

I made "ripples" around the shape of the ghost, to machine quilt it

I blanket stitched the applique shape, using my Viking Topaz.  I love this stitch!
Now for the binding:   I have started  using this great machine binding method for small projects, like mug rugs , wall hangings and pot holders.  My clever sister, Amy, of Amy Made That! has put  her method together into  a free pdf file download (free pdf.)   (Treat yourself and go look at her blog!  I just love her style and fabric choices.)

Reality... I did not photoshop-out my imperfect binding.  It is  a little  wavy in  areas...  (And my photos seem to magnify the waves.) ....and a bit wonky at both of the right- hand corners.  But I can live with the way it looks .  Neat and clean. And it doesn't take much time to execute this method  on the sewing machine.  
Reality... Amy makes them near perfection! [ I have a lot of catchin' up to do to get even close to her level!!]
My Wonky Ghost Mug Rug

This is my Candy Corn Mug Rug:
 
Candy Corn mug rug  
 I just pieced some fabric leftovers for the back.
Back side.   No problems with this binding. I did this one BEFORE the Ghost... go figure!
Well, time to stop sewing and go shopping for some fall-flavored coffee! So I can use my rugs.
Let me know if any of you are running a Mug Rug Fever!    It is contagious!  :) sorry  not really

I'm off to my sewing room!


Saturday, September 15, 2012

Halloween fun

Trick or Treat Bags for the Triplets!

This week, I decided to  make some Halloween trick-or -treat bags for my great niece and great nephews, who happen to be triplets! This is their first Halloween in which they know that they are dressing up and going to get candy.

I got my inspiration from a tutorial on Cluck Cluck Sew.com ,  called Easy Treat Bag Tutorial.
The tutorial gave me the dimensions for  a toddler sized bag of 11" wide by 13" tall.

I made a few changes to her directions:
  • I used Halloween fabrics, so added Pellon Fusible Fleece 987 to the front and back outer pieces , for strength and shape
  • I used a 1 1/4 inch strip of PFF 987 on the handles, to give strength
Pellon Fusible Fleece 987    I LOVE THIS STUFF!


  • I appliqued the felt shapes on to the fronts of the bags, using Heat n Bond lite  (therm-o-web) iron -on  adhesive.  Then I used my sewing machine  blanket stitch to outline the shapes. 
Applique with blanket stitch
  • I made the boxed corners, for the bottom of the bag, slightly smaller
  • I basted the handles to the front and back, THEN sewed the front and back pieces together.

The handles are basted on to the outer pieces
  • I put right sides together , by placing the lining  (right side out) inside of the outer bag pieces (fleece side out and handles tucked inside between lining and bag pieces)


Turning the bag inside out-   the fun part!!
All ready to fill!
Candy Corn

Black cat.   My kitty, Whiskers, really runs like this when she plays!
Ghost.
Thanks to www.FreeApplique.com for the outline shapes for my appliques!

Then came the REALLY FUN part!  My family came for a visit and I gave the kids their bags.


Alex, Andrew and Jack holding their bags
I think they were still confused about what the bags are for... but it won't take long on Trick or Treat Night for them to figure it out!!


I'm off to my sewing room!


Couldn't resist putting in this TRIPLETS AND  Whiskers picture!


Wednesday, September 12, 2012

Softly Against Black Contest

Choose your own fabric bundle

If you could pick out your very own selection of  fabric for a  bundle...what would you pick?

Isn't that a fun idea ? Think about it.... being able to pick  out  your own choices of  fabric to make a bundle , and then see the real bundle in  a store ...

 Rachel,  from Stitched In Color, and                                                                  
are giving  us all a chance to do just that, with their  fabric mosaic contest .  The top 2 vote winners will be able  choose their  own fabrics bundle from Fresh Modern Fabric!  
We are to choose  fabrics to express our interpretation of Softly Against Black.  Our  collection of fabrics can be pretty, cute, dramatic, or running in the direction of Halloween. 

This is my mosaic of the fabrics that I chose from Fresh Modern Fabric:

Softly against black  1 by Susie's Sunroom

My inspiration came from the 2nd fabric,  the turquoise rain, and the 5th fabric,  the city skyline.

In the city, the  storm begins , and all becomes lit from the lightening; rolling through,  it soon fades  into drizzles , and is spent ...


Go on over to see all the fabulous creativity and ideas!  Voting opens up on Friday, Sept. 21.  I can't wait to see who wins!

I'm off to my sewing room!


Monday, September 10, 2012

Apples in a Basket Block


A Year of  Paper Piecing   Book

September is a beautiful time of year in southeast Pennsylvania.  The days are warm in the afternoon , with lower humidity, and the evenings cool down quickly.  Time for baking apples and cooking soup.
Time to make a basket of apples wall hanging, too!

I found a really great book, on Amazon.com, called  A Year of Paper Piecing, by Beverly A. Maxvill.    
It has 12 Seasonal designs for 12 inch blocks, with some great instructions to do paper piecing and a little  quilting.   I was lucky enough to find it sold as a used book, and I don't think it was ever used!

I picked up some fall toned fabrics while  on a fabric store shopping trip with my friend, Maxine.  I found some pretty reds and browns and greens in the Marcus Fabric lines.  After I had the material cut, I  got excited and was  amazed at how much I loved those colors!  I had never paid much attention to these more traditional fabric lines before.  Maxine and I  were very close to squealing with delight, because we found some really pretty fabrics, and they were ALL 20% off ! Winner, Winner, Chicken Dinner!!   
My new fabric
I am pretty new at paper piecing, but really love doing it.

I got started , and after choosing which reds to use for which apples, it went quickly. (  I should've made a diagram with the materials designated to each apple , because I got myself confused with the same apple being in  more than one row of the pattern. )


 This one multi-pieced section took me some time to make sure that I put the 4 pieces together in the right order.   Paper piecing patterns can confuse me, because they are printed backwards.    So after I figured out how the four sections joined together, I took a picture of them in the right order, and made a diagram for my notes.  


This is how the sections A thru J  look before sewing them all together.  Elongated, to allow for the 1/4" seam allowances.  My husband said they look like houses piled on top of each other!.

Luckily,  I took my time and looked this over. Have you experienced paper piecers  seen my error already?   The directions told me to piece 2 little sections of background fabric to the row of the basket rim.  That's what I thought I did...
Then, I went back to her directions in the book , and read them properly, to learn that I needed to rip out those  two  background rectangles and the whole  top edge of the basket, and attach the background pieces  before I pieced the basket top and bottom pieces together.   And I had to add some background rectangles to the bottom basket piece, too.

That is when I decided to name my little seam ripper, Cruella DeRipper.   

I also remembered a very simple but handy tip that I am beginning to use a lot  in paper piecing.... 
For tricky sections.... baste  it first. 
Then  open it up, see if it is lined up properly,  and then resew it properly.  It is easier to rip out basting stitches,  than the tiny size 2 stitches I use for paper piecing!! (Plus, I don't need my ultra- magnifying reading glasses to rip out the basted stitches!)

Since basting size stitches are more similar to hand piecing,  I found I  Cruella can rip out a  specific ,small area that is not exactly matching, and I can maneuver it around/play with it, to get it to meet-up  better, while leaving the other areas intact that don't need moved. Give and Take....


                   Here is the   block, with the side strips being added. 
 I had 2 little squares to sew together on the top and bottom strips. I remembered  to make sure it lined up properly before I sewed them on.  I have learned to "piece them" at the right spot as  I sew them on... by  testing them pinned- on before I sew them. (Cruella pouts when I  actually remember to do this...)

Before I knew it, it was time to add the batting and backing to make my quilt sandwich.
I used some Warm and Natural for the batting, and some natural colored linen blend from my stash for the back.
The author suggests sewing the front and back together, right sides together, and then turning it inside out,  rather than binding the edges.  [ In her book, she puts velcro on the four back corners, and attaches it onto a quilted background with velcro , changing the block every month.]  I want to hang my  quilt block on a dowel rod, under a shelf in my kitchen.


So I  made  two corner pockets on the back, to hang this little block by.  They are  attached on the back in each top corner ,and  basted in place  before sewing the front and back together, right sides together.   This clever  method came from A Girl In Paradise ,  Ann.   (This tutorial ,  Hang your quilt using corner pockets  , explains how to make these pockets.)   The corner pockets works well for me. I just hang a tiny dowel rod under my shelf, attached to two eye hooks. Now,  I can keep  the dowel rod in place for all 12 blocks, and just take each block off of the rod by sliding  it out of the  pockets.
Corner pockets were machine sewed in.... and you can adjust to what size you like.  I made my squares 7 1/2 inches .                                                                

Next,  I wanted to try some very minimal hand quilting around the ouline of the apples and basket, and the outside edges .   I have never hand quilted before, but so admire all of the work that I see from you amazing quilters out there!  This includes quilts that my sister,  Amy  ( AmyMadeThat! ), has made for me.  

So I got out a needle and some  thread, and quilted a little  on my  apple block while watching tv last night. It was very relaxing. (It helped to use my strong glasses and a light aimed right on my  work.  )  My kitty, Whiskers, tried to help me with my thread management .   What would I do without her help?!


My stitches are not perfect, but I think I am pleased with my first hand quilting stitches results.  I love this pattern, because the little stems on the apples are not  fully attached, and they stand up a little.  

                                              
                                                       Apple stems stand up 


                                          Minimal quilting


                                           September block -  Apple Basket  


                                       Here it is in place under my shelf. 
September is ready for me to enjoy.
I can hardly wait for October's pattern.

Let me know if you get the book and want to sew along with me.  

I'm off to my sewing room!


Thursday, September 6, 2012

Mug Rug Making Time!

It's time to have fun with mug rugs!

Recently , an overseas friend,  Amanda, from The Patchsmith,  began  selling her original (and totally cute ) designs on Craftsy .  When I looked at her patterns on Craftsy,   I immediately fell in love with her Scottie Dog Mug Rug Pattern!! 
                                        Amanda's Scottie Dog Mug Rug   - The Patchsmith

And I knew I wanted to make this for my mother. Years ago, she bought a little sweater for my daughter,  then just  a toddler, that was red with a cute Scottie Dog applique on the front.  I think Amanda's mug rug brought back that fond memory.

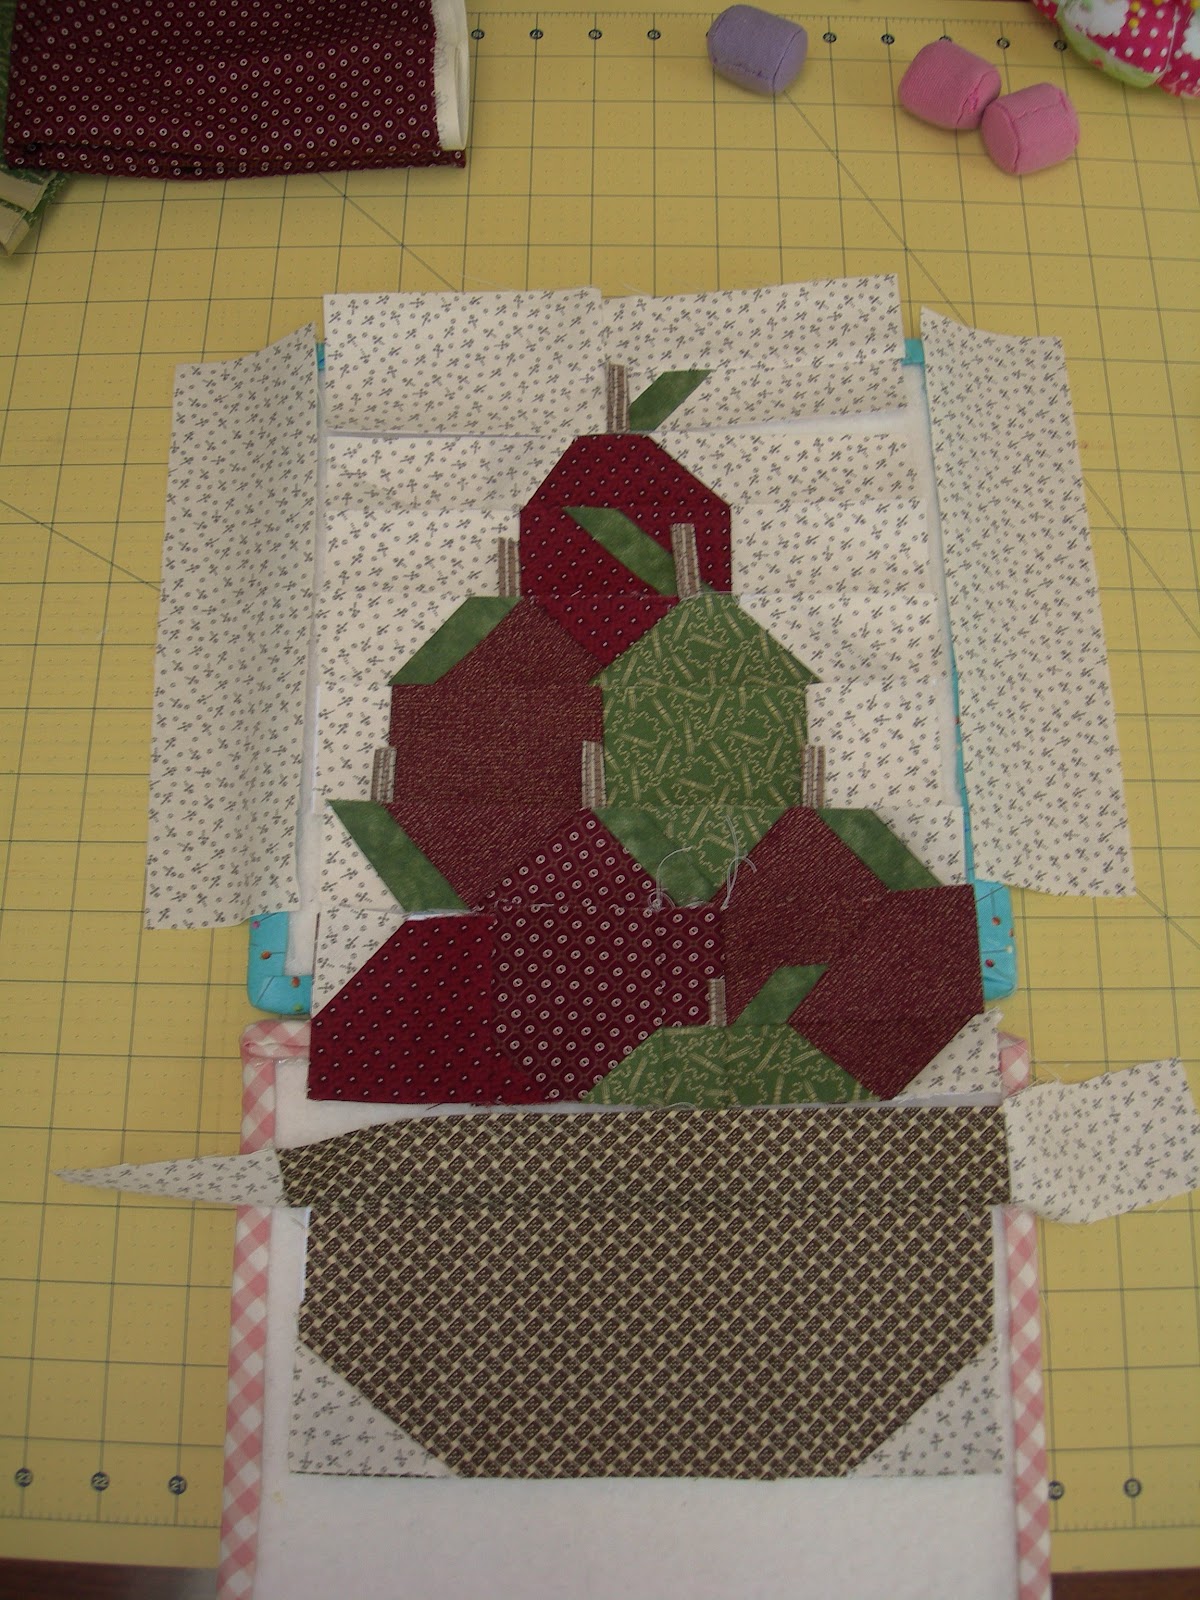
I went to look over my fabric stash, and found that I had some  black and white fabric , with some gold scrolling in it.  It was actually part of a holiday fabric line by Moda.  After digging around more,  I decided to make it a Christmas Mug Rug. 
                                   About ready to cut out the dog applique...  

Amanda's directions are clear and easy to follow!   I used the Moda fabric for the doggies, and  some past year's JoAnn holiday fabrics for the rest. 
             I picked the plaid fabric for the back, as well as for the doggie coats.


                               I handstitched the binding to the back side...


                                 And then  added a red and a green button!


                           The doggies are ready to go in the mail to my mother!

As soon as  I made the mug rug, which made up QUICKLY,  I wanted to make another one!  But, I had to take a break , to get our son organized to go back to college.


When I told my sister, Amy, of  AmyMadeThat! , what  projects I made for the week, she told me that she just made the same mug rug for my mother's friend, who has a Westie dog (A West Highland Terrier ).  (This poor little Penny  is very sick.  ) 
            So , there we had a Sister To Sister Mug Rug Challenge, without even trying!


                                         Amy's  Scottie Dog Mug Rug
 (I am totally jealous of   pretending not to notice her mug that coordinates with her mug rug.)
                                
I like all 3 versions!  What do you think?   Go on over to check out Amanda's  and Amy's blogs to see how talented these two are!  (Amy also has an etsy shop and sells patterns on Craftsy.)

I have another fabric variation  for a  Scottie mug rug in mind already.  I am going to try to make some for Christmas gifts early .

I am  so thankful for all of the new friends that I have met through reading blogs,  sharing pictures on Flickr, and now writing on my own blog. On top of all of that,  I  just fell  into a "lucky spell" .    I really never won anything before.  

A few weeks ago, I commented on one of my favorite blogs,   Annie's musings , telling Annie that I thought, ME! ME! ME! "   I should be the recipient of her beautiful , but still un-named,  fabric postcard with a flower.   
Guess who she picked?!   Yes,   lucky- ducky ME!   


                                                 I named this precious work of art-
                                                  Black-Eyed Susan Joy.
She has a tutorial describing how she makes her fabric postcards, and then how she actually can MAIL them through our postal system!   (Go see her blog to see what an amazing artist she is!  I love her designs!)


                      The back side is actual paper-   with a note from Annie to me!
(I asked her to mail it in an envelope, because we had bad weather for a long time  , and I didn't want any part of it to get  wet or ruined in route.)
Thank you so very much, Annie, for your generous gift! I treasure it!   I will think of you and smile every day when I see my postcard in my Sunroom!!

That's not the only thing  I won ....

I'm off to my sewing room!